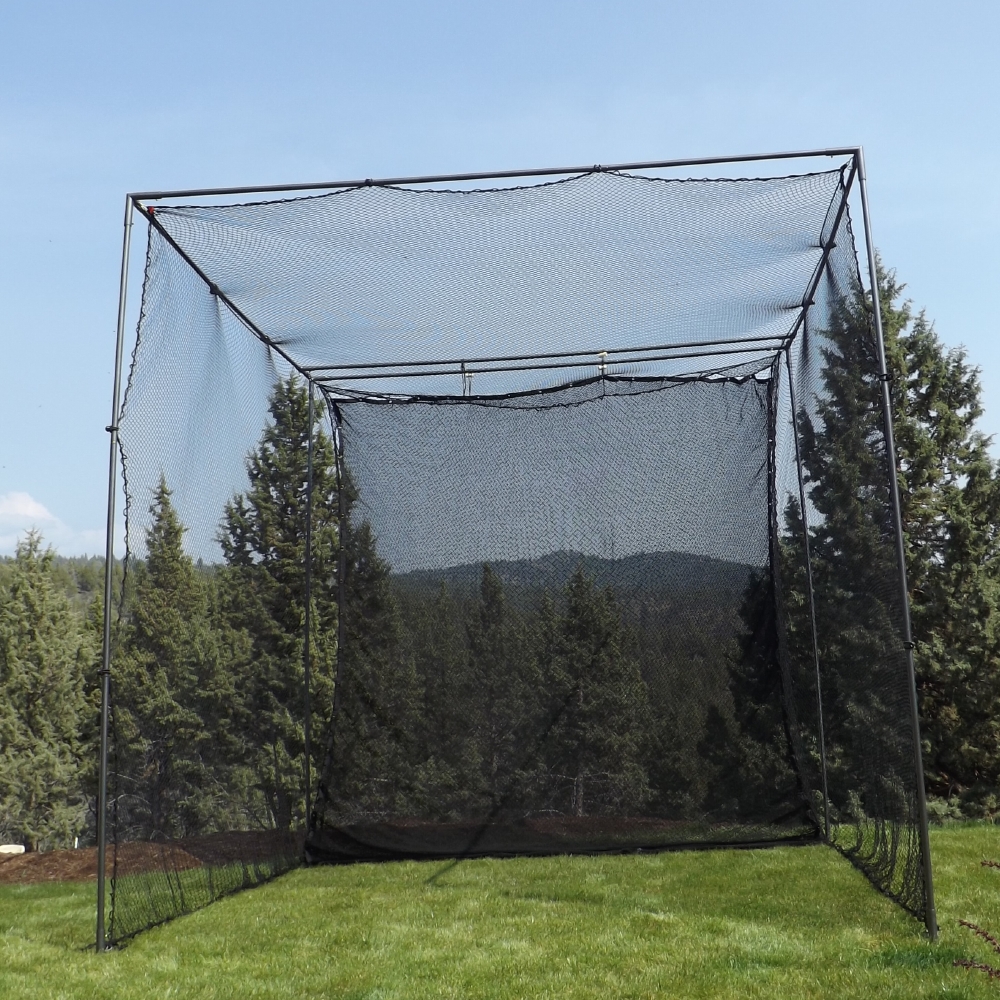
Golf Cage Frame and Net Install
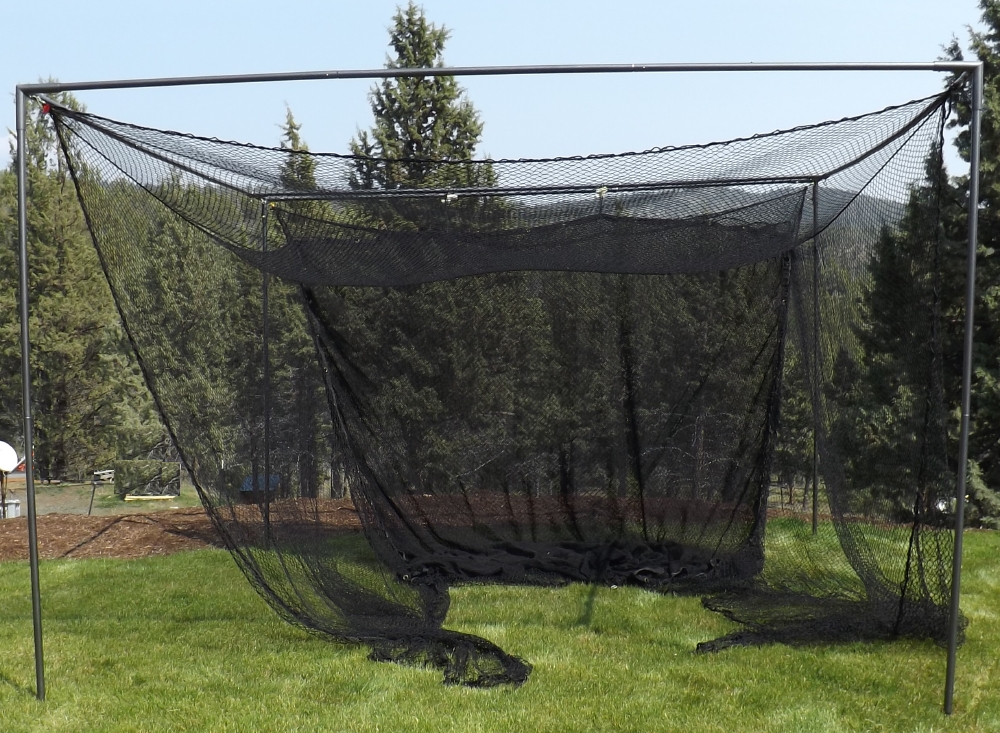
Below are the steps you need to take to install a 10' x 10' x 10' Golf Cage Net on a 10' Square steel frame
If you purchased our 1" complete frame here is what you will receive
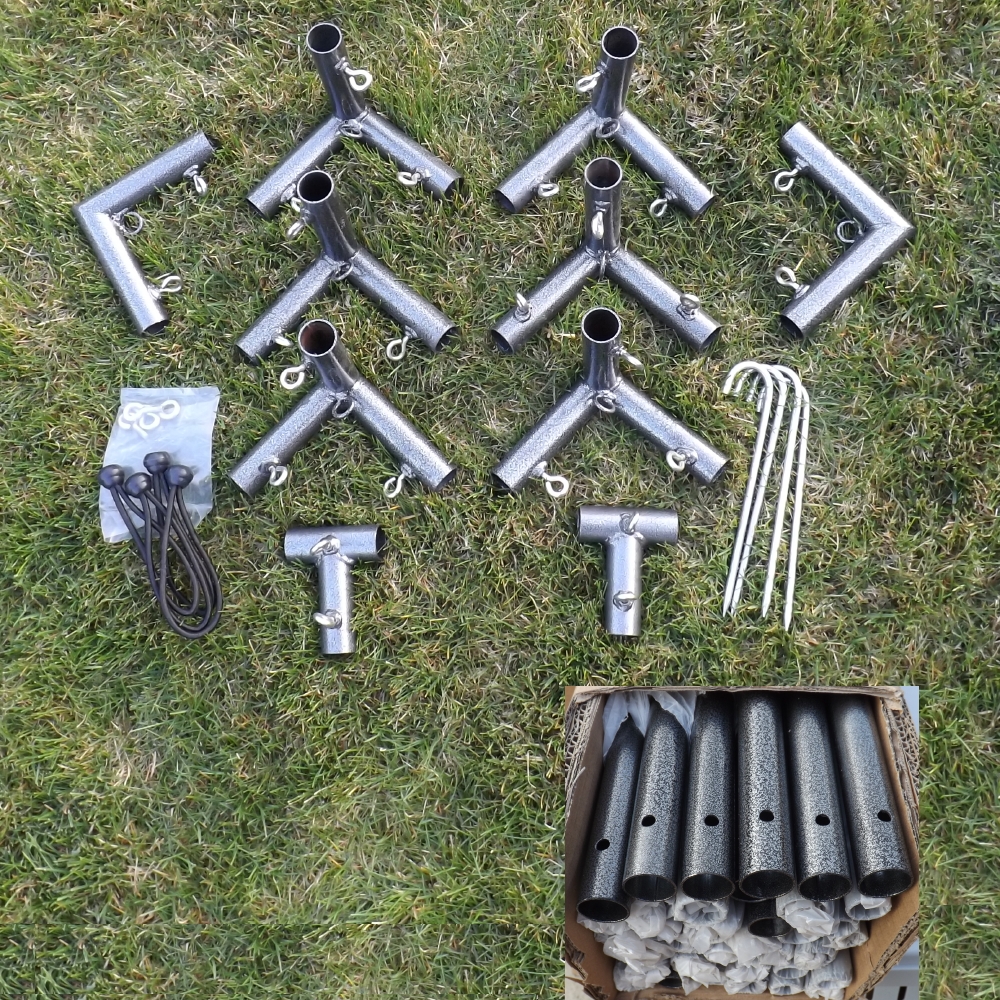 If you purchased the 1" or 1-1/4" Fittings only the package will look the same except you will need to supply the 1" EMT (Electrical Metal Tubing) found at most hardware stores, you will need 11 x 10' lengths
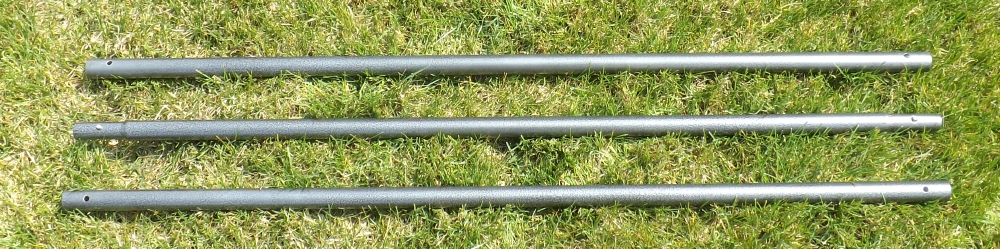
First step is to assemble five of the poles, each pole is made up of three sections snap locked together, center section has a male end on each side two outer sections have female ends
 Next step you will need four 3-way fittings and two T-fittings, attach the two T-fittings to each end of one of the 10' poles (attach the bottom of the T) then lay out the poles in a square pattern, slide the pole with the two T-fittings onto the ends of two of the other 10' poles (this will be at the back of the cage to support the impact panel), then attach the rest of the 3-way fittings, use thumb screws to lightly hold the pole on the fitting
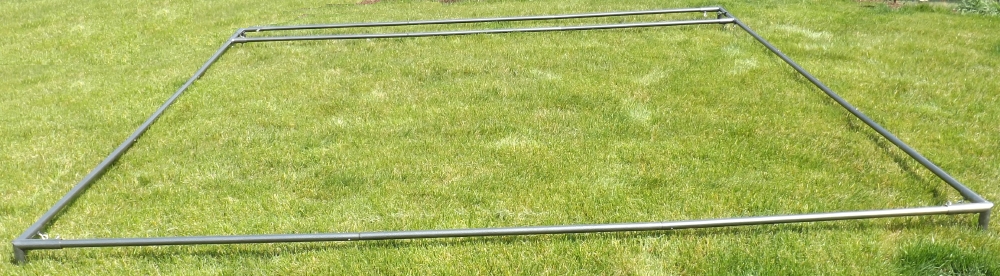 At this point it is best if you have two people assembling the frame, with one person on each side insert one of the outer pole sections (female at both ends), after you get all four corners installed next start adding the center poles (with male on each end)
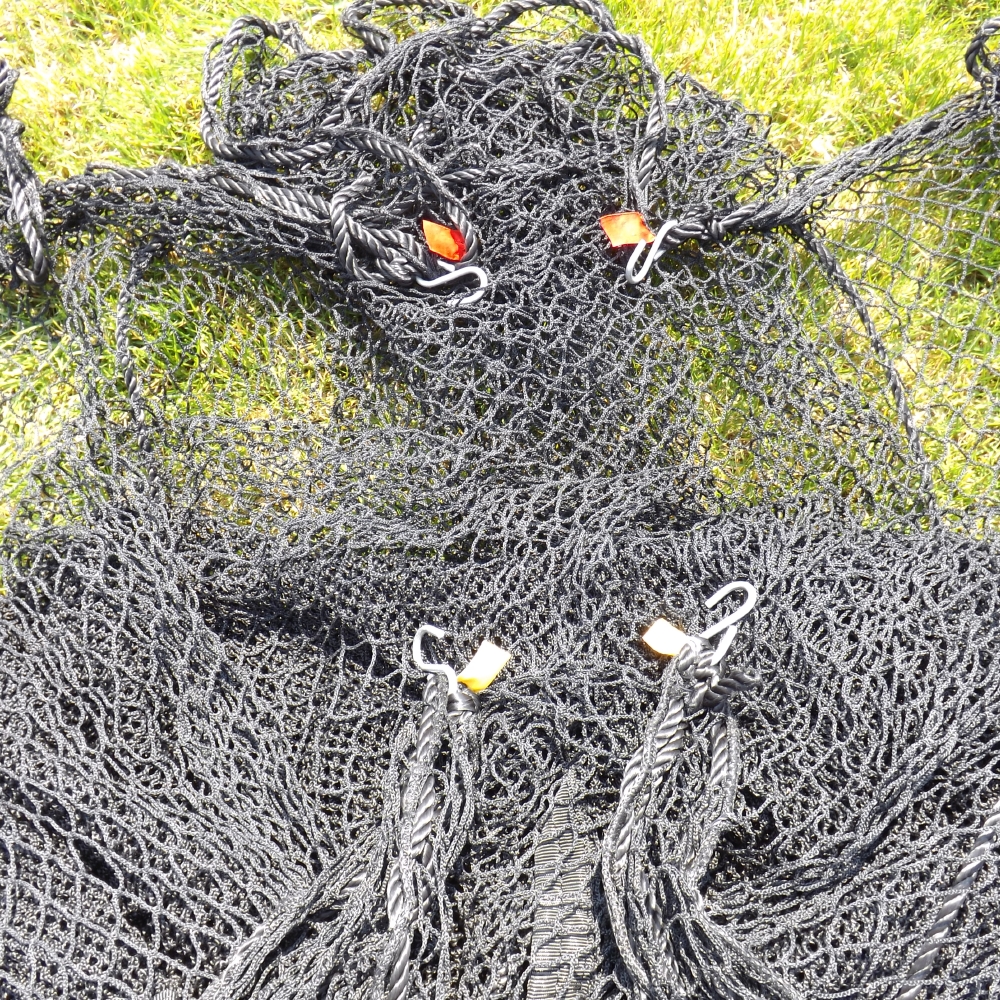
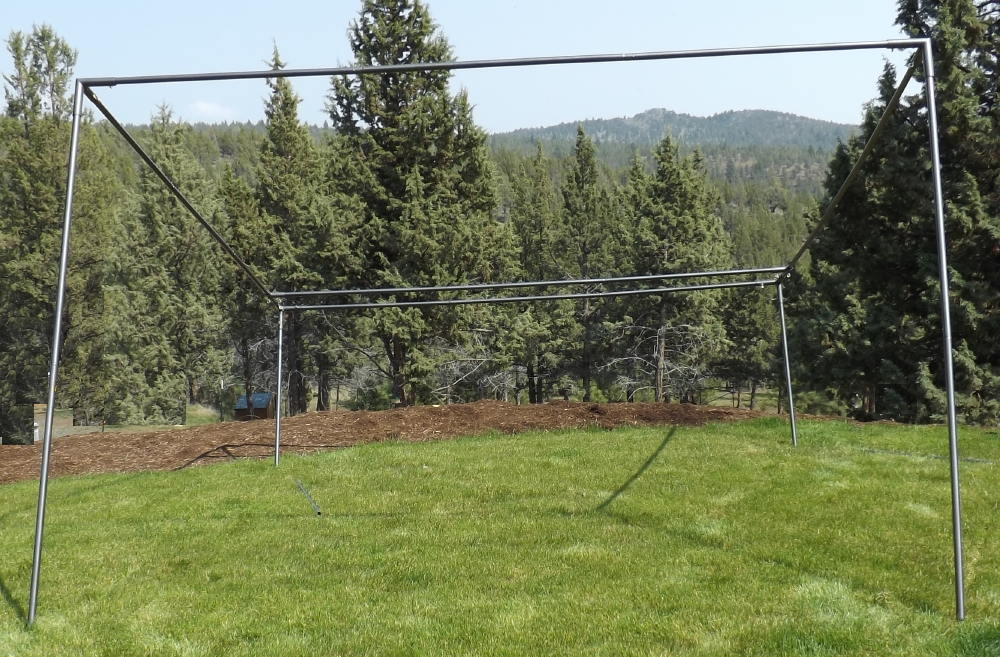 At this point you can install the net so you don't have to use a ladder, attach the top by hooking the S-hook with yellow tags in the back and red tags in the front, install a ball bungee at each pole snap fitting so there will be two ball bungees per pole, for the front two upright poles, bottom two side poles and three top poles front and sides, it's better not to attach the back with ball bungees, there are two straps with plastic PVC that get attached in the back and also two for the impact panel
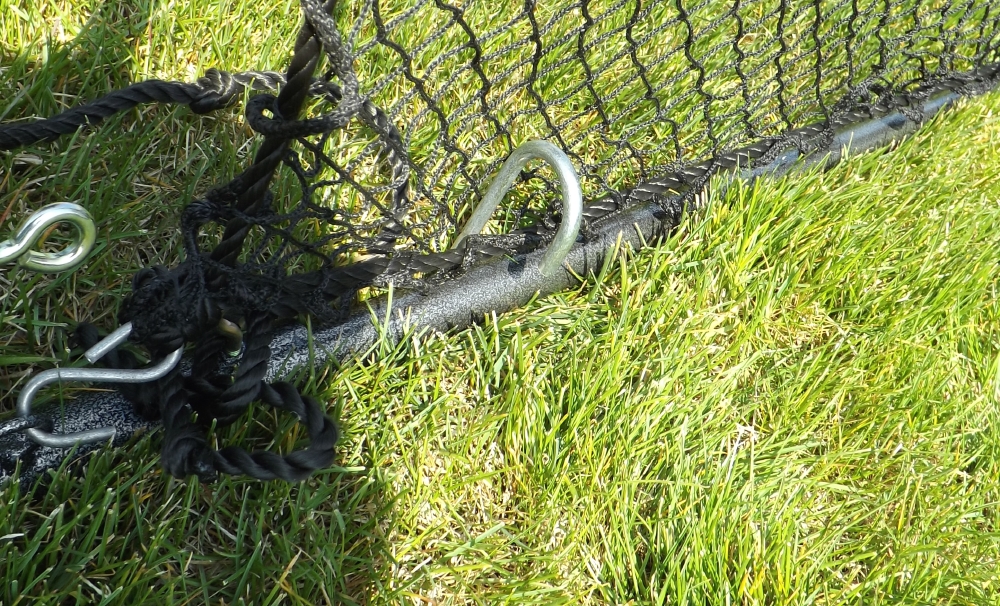
 Once everything is attached insert last four pole sections and install poles and fittings on bottom and attach S-hooks in corners and ball bungees on bottom
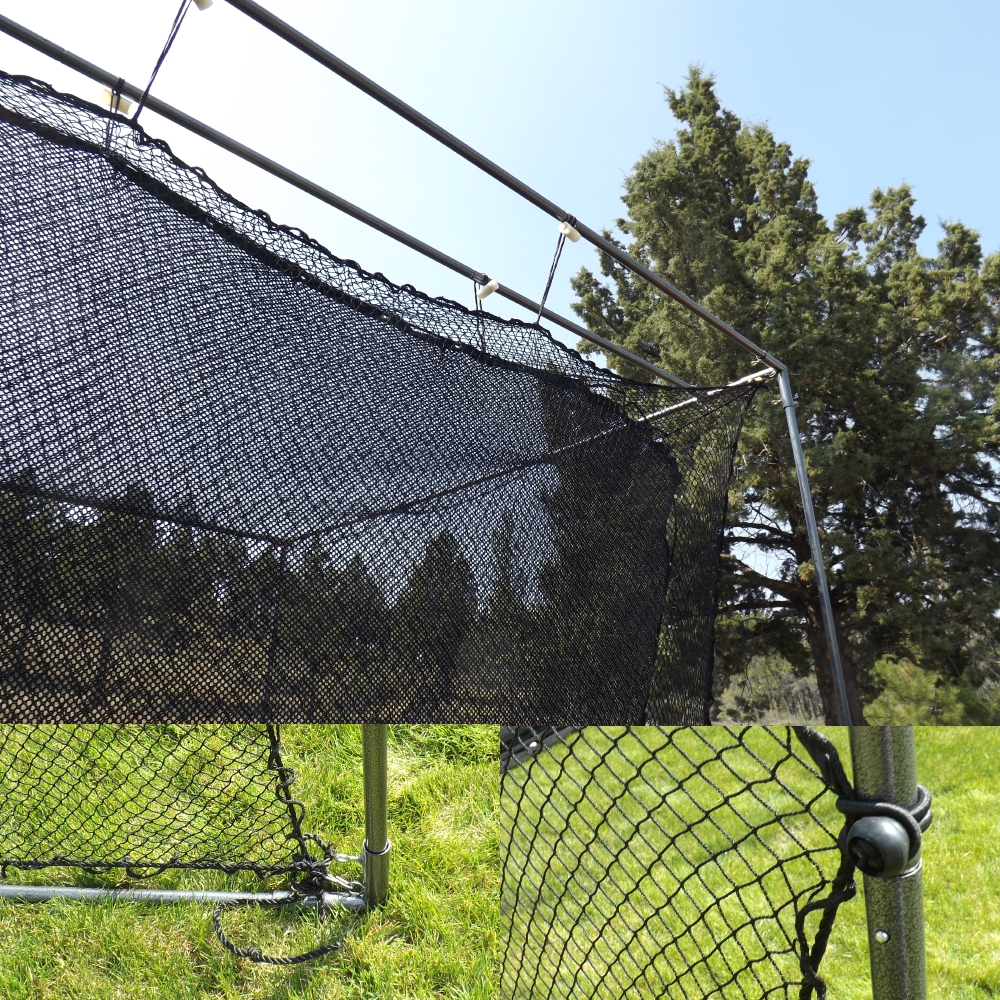 Last step is to attach the J-hooks to hold the cage down, this is a large top heavy structure and is prone to be blown over in even light winds, if the cage is out in the open where it can blow over it would be best to take further steps to secure the frame, if it topples over the frame poles and fittings will get damaged
 If you need to take the Golf Cage down using a step ladder unhook net from corners and remove ball bungees, next loosen all thumb screws and start removing poles from the top and work your way down, this can be done by one person but it's easier with two people
If you purchased our 1" complete frame here is what you will receive
If you purchased the 1" or 1-1/4" Fittings only the package will look the same except you will need to supply the 1" EMT (Electrical Metal Tubing) found at most hardware stores, you will need 11 x 10' lengths
First step is to assemble five of the poles, each pole is made up of three sections snap locked together, center section has a male end on each side two outer sections have female ends
Next step you will need four 3-way fittings and two T-fittings, attach the two T-fittings to each end of one of the 10' poles (attach the bottom of the T) then lay out the poles in a square pattern, slide the pole with the two T-fittings onto the ends of two of the other 10' poles (this will be at the back of the cage to support the impact panel), then attach the rest of the 3-way fittings, use thumb screws to lightly hold the pole on the fitting
At this point it is best if you have two people assembling the frame, with one person on each side insert one of the outer pole sections (female at both ends), after you get all four corners installed next start adding the center poles (with male on each end)
At this point you can install the net so you don't have to use a ladder, attach the top by hooking the S-hook with yellow tags in the back and red tags in the front, install a ball bungee at each pole snap fitting so there will be two ball bungees per pole, for the front two upright poles, bottom two side poles and three top poles front and sides, it's better not to attach the back with ball bungees, there are two straps with plastic PVC that get attached in the back and also two for the impact panel
Once everything is attached insert last four pole sections and install poles and fittings on bottom and attach S-hooks in corners and ball bungees on bottom
Last step is to attach the J-hooks to hold the cage down, this is a large top heavy structure and is prone to be blown over in even light winds, if the cage is out in the open where it can blow over it would be best to take further steps to secure the frame, if it topples over the frame poles and fittings will get damaged
If you need to take the Golf Cage down using a step ladder unhook net from corners and remove ball bungees, next loosen all thumb screws and start removing poles from the top and work your way down, this can be done by one person but it's easier with two people